


Fold a Book Into a Bunny
Book folding is a calming, hands-on craft that transforms something ordinary into something special. With a little patience and repetition, you can create a rabbit design that fits perfectly on a bookshelf, mantel, or entryway table. It’s also a wonderful way to give a well-loved book a second life instead of letting it go to waste.
With spring and Easter just around the corner, this means it is the perfect time to add a seasonal touch to your home. If you’re looking for a simple and meaningful DIY project, this Rabbit Book Folding Craft is for you. This activity will take a few hours so this is a perfect craft to enjoy on a rainy day. It’s a relaxing and a beautiful way to welcome the new season.
So let’s hop to it and get crafting!
Materials
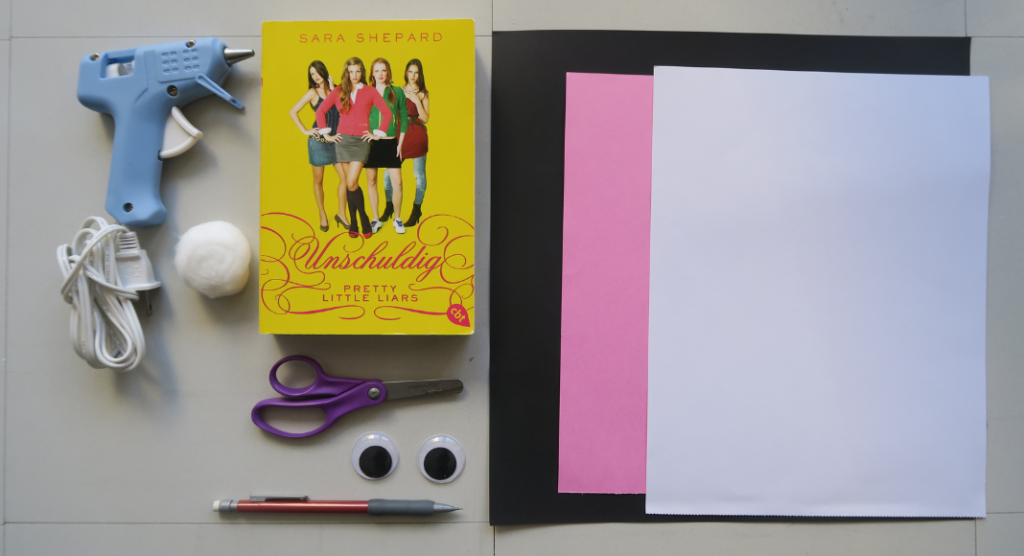
– 1 Paperback book (About 300 pages)
– 2 Googly Eyes
– Construction or Cardstock Paper (black, pink, & white)
– Scissors
– Glue Gun
– 1 Cotton Ball
– Pencil
Directions
- Take your paperback book and carefully tear or cut off the front and back covers
- Open up your book to the halfway mark and cut or tear it completely off. Set one half of the book aside for now.
- Now we start the 3 folds. Take one page of the book and fold the top right corner down towards the spine, but fold only towards along the text.
- Then take that same page and fold it backwards toward the spine again, and line it up along the text.
- The last fold is grab the bottom pointed corner and fold it up to hide it.
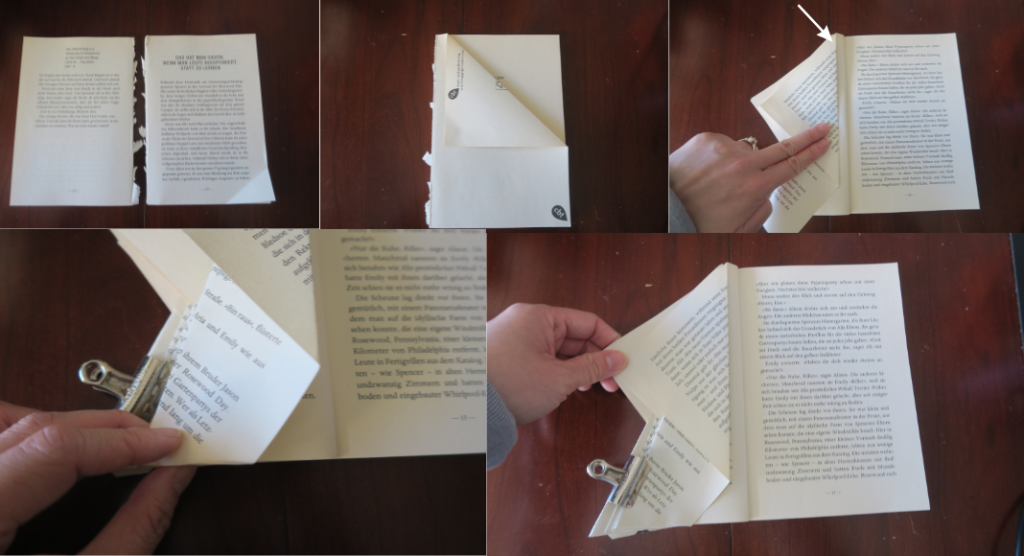
- Now the fun part. Repeat those same 3 folds on the rest of the pages and set aside when completed.
- Grab the other 2nd half of the book we put aside earlier and repeat the same 3 folds on each of the pages for the rest of this book.
- After that is done, now hot glue both of the halves together and set aside.
- Grab the white and pink construction paper and draw some rabbit ears. I made the white outer ears about 6×2 inches. The pink inner ears are about 4×1 inches. But you can just eyeball it and make it whatever size you want.
Here is a rabbit ear template to make it easier for you. - After you have drawn the perfect ears, take your scissors and cut them out and glue them onto the top of your rabbit.
- Time to put together the rabbit’s face. Glue on the 2 googly eyes on its head.
- Take the black construction paper and cut out 3 small strips to make the whiskers. I made mine 5×1/4 inches, but you can make it as long and thick as you want.
- Put the strips on top of one another but criss-cross in the center and glue it down.
- Grab the pink paper and cut out a small triangle and glue it in the center of the whiskers. Then glue the whole set onto your rabbit’s face.
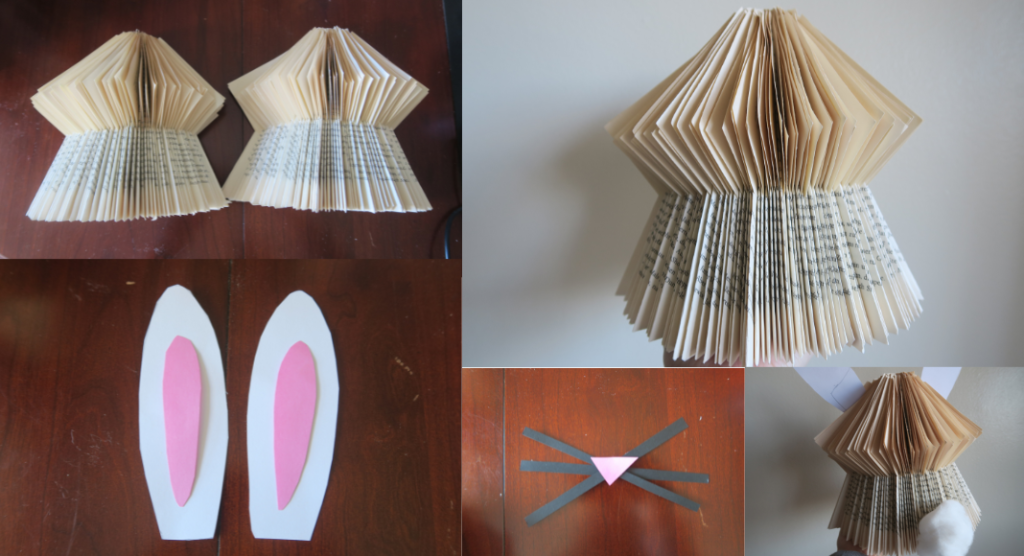
- Next, grab the cotton ball and fluff it up a little bit and glue it on the back of the rabbit for the tail.
- And that’s all, folks.
This is optional, but you can add some decorations to your bunny, like a cute paper flower. Be as creative as you want. Add some Easter grass and a few colorful paper Peeps to make your bunny feel egg-stra special! 
If you enjoyed this DIY Rabbit Book Folding Craft, be sure to visit our Pinterest page and explore more crafty projects on the Military Mom Collective blog.
Happy crafting and happy spring!


