


Where are my sourdough sisters? You have your starter ready and you’re not sure what to do. Try this easy “NO Knead” sourdough bread recipe. As King Arthur Baking states: “characterized by its crusty, chewy texture, robust sourdough flavor, and rich golden color, this no-knead sourdough bread has become a favorite in our Test Kitchen. It relies entirely on its starter for leavening; but with an active, bubbly starter, a little bit of patience, and minimal effort (no kneading!), you’ll be amazed by this stunning, delicious loaf.” I couldn’t have said it any better! Thank You King Arthur for the base of this recipe, but I have made a few changes or additions of my own.
Ingredients: 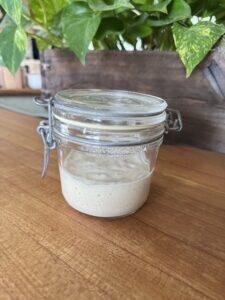
1 C (277 g) ripe sourdough starter
1 3/4 C (397 g) lukewarm water
5 C (600 g) Unbleached bread flour or I have also used All purpose flour, whole wheat or golden wheat flour
1 TBLSP (18 g) sea salt
Directions:
- Start by weighing your flour; or spoon the flour in to your measuring cup and level it off with a butter knife.
- In a large bowl or your stand mixer bowl combine all ingredients.
Mix and stir everything together to form a sticky, rough dough. This is where you stand mixer with the paddle attachment comes in handy. Beat on medium steed for 30-60 second. Don’t have a mixer, you can use a big spoon or dough whisk. - Leave the dough in the bowl and cover with plastic wrap and a dish towel. Let it rise for an hour.
- Gently pick up the dough and fold it onto its self a few times.
- Recover and let it rise for another hour.
- Repeat the rising, folding process for a total of three hours.
Folding once more then place dough in the refrigerator for at least 8 hours up to 48 hours. - When you are ready to make the bread, place dough on a floured surface. Shape into a ball.
- With the seam side up, cover it and let it rest for 15 minutes
- Next shape the dough to fit your baking vessel. ( Dutch oven, covered baker)
I used my banneton proofing basket with a silicon bread sling placed in the bottom. - Let the loaf rise and warm to room temperature about 2 1/2 – 3 hours. It may not rise up but may expand and relax.
- Move your oven rack position to the middle and pre heat your oven to 500 degrees at least one hour before you are ready to back. I placed my Dutch oven with its cover in as well.
- Just before placing bread in the oven dust with flour.
- Use a lame or sharp knife to cut a few 1/2 inch deep slashes. Cross or crisscross pattern works as well.
- Reduce oven temperature to 450 degrees.
- Place your bread in your baking vessel with lid on and cook for 45 minutes
- Remove lid and cook for an additional 10-15 minutes until is it golden brown and crusty and internal temperature is 210 degrees.
- Remove bread from the oven and cool on a wire baking rack.
- Store in a sealed bag* for several days on the counter or freeze for longer storage.
Notes:
Servings: Makes 1 loaf
Prep time: 20-25 minutes (does not include rising time)
Cook time: 55 minutes
Total time: 12 hours and 35 minutes
Other: I store my bread in bees wax bags!


